Showing posts with label La Carta. Show all posts

Friday, 16 November 2012

3D Wheelbarrow

This is another 3D project using a Sizzix die. It looks so sweet after adding lollies/candy into it.
Youtube tutorial: https://www.youtube.com/watch?v=uwTH04CPbFs


Items used:
Wheelbarrow die by Sizzix
Strong glue
La Carta Weave in Crimson 12x12" cardstock
Sam & Lucy's self adhesive glitter foam in red and green
Cardboard (from an old cardboard box)
Ink
Die cut 2 sets of the wheelbarrow shape out of cardboard. Then die cut another 2 sets out of cardstock making sure you flip one of them around so the front of the cardstock will be facing out once you put it together (this is especially important for cardstock like the La Carta Weave or Bubble that have texture on the front).
You will also need a piece of cardboard 2 3/4" wide x 6 5/8" long and a piece of cardstock 2 3/4" wide and 12" long to cover most of the centre piece of the wheelbarrow. There will be a small gap so a small piece that is 2 3/4" wide and approx 2" should be able to cover the gap if you need it.
Adhere the centre piece of cardboard with the La Carta cardstock. Thenadhere the rest of the cardstock pieces onto the matching cardboard pieces.
The pieces should now look like this.
Adhere the centre piece of the wheelbarrow to the back of one of the wheelbarrow shapes.
Adhere the other wheelbarrow panel together
I added some black ink to the pieces before adhering them to the wheelbarrow. I also inked the edges of the wheelbarrow to create shadow effects. I cut stars out of Sam & Lucy's self adhesive glittered foam sheets and adhered them to the sides of the wheelbarrow.This wheelbarrow is great for adding candy or lollies inside or can hold some items you want to store.
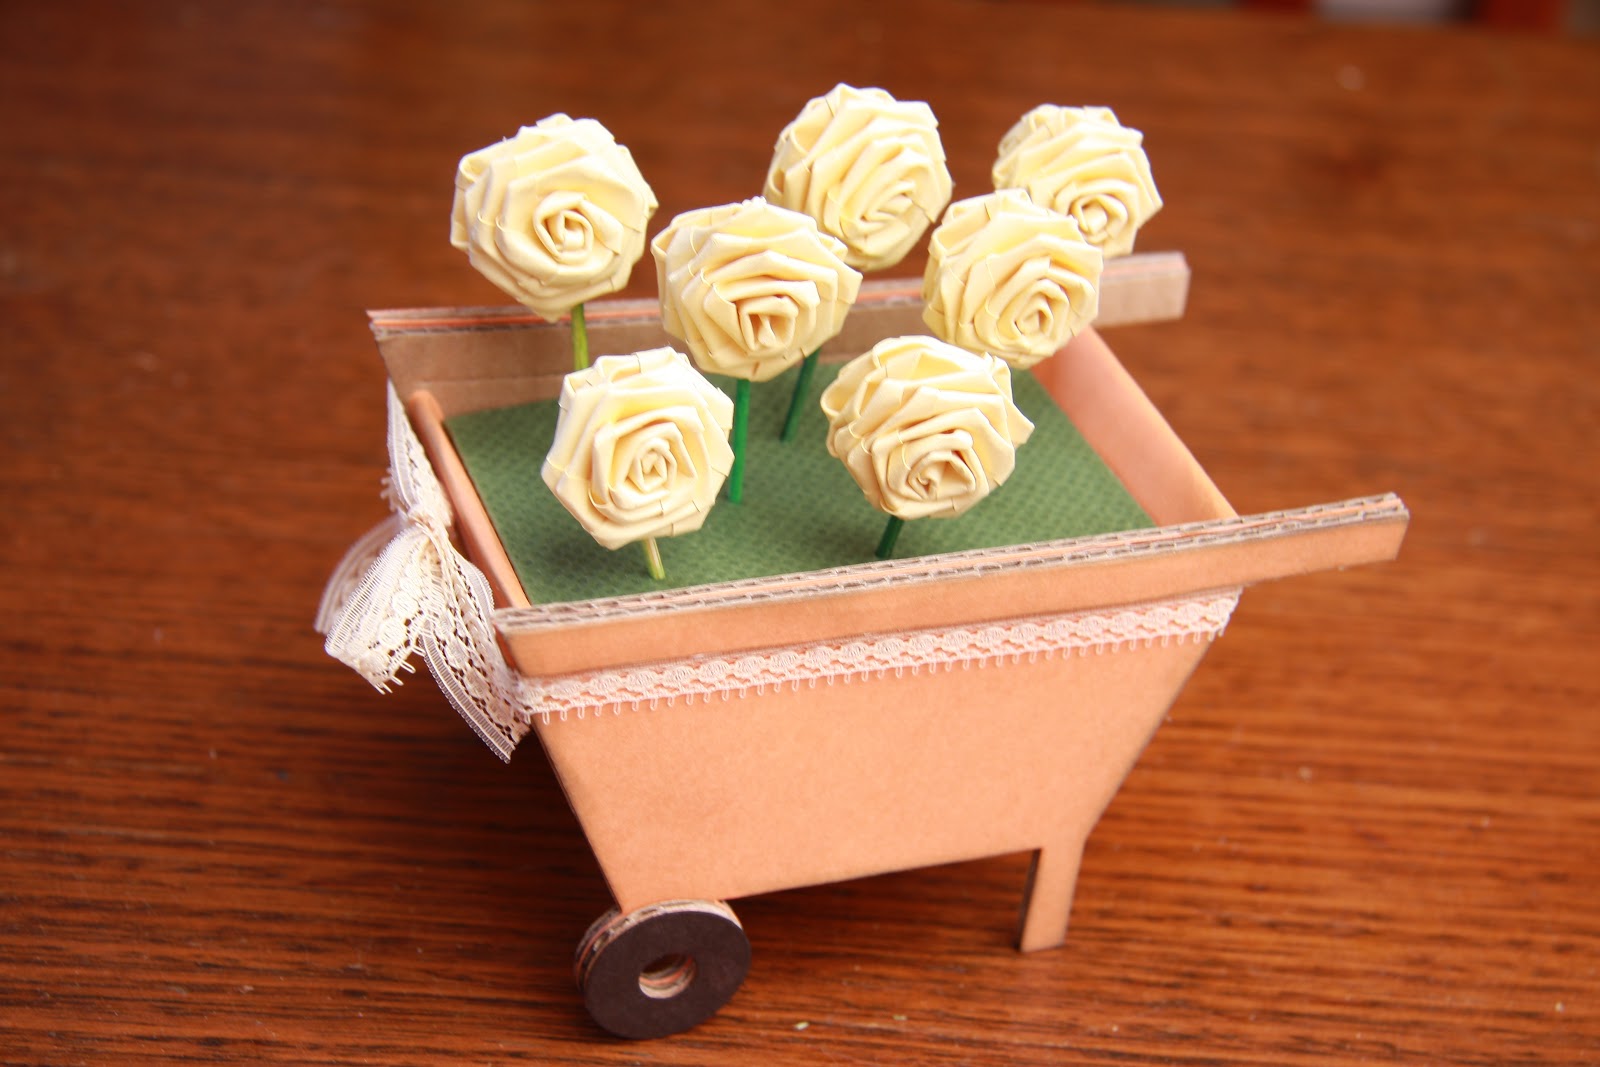
This wheelbarrow I created is for decorative purposes. I filled it with foam and covered the foam with cardstock and added flowers on toothpicks into it. I also glued a lace ribbon around it.

I hope you enjoyed the tutorial and inspired you to make one yourself! Take care :)

Tuesday, 13 November 2012

3D Baby Shoe

Baby shoe project I created using a 12x12 Bubble cardstock by La Carta and lace trim.
The website for the free template is: http://www.paperscrapz.screentastic.ca/templates.html

The video tutorial for this project is on: http://www.youtube.com/watch?v=8W3dl1BNQfw&feature=plcp
Trace out the components onto the back of the cardstock. Trace an extra set of soles as inside liners of the baby shoe.
I didn't cut out the tabs around the shoe. I just left them solid and then snipped the edge where the tabs should be so the shoe could have a complete seal around it.
Then I glued the ends together before assembling the top part of the shoe to the bottom of the shoe.
Once the glue is pretty dry, I trimmed the shoe liner slightly and then glued to the insole part of the shoe.
I added a lace trim to the entire edge of the shoe to finish it off.
Punch a 1/16 hole for the brad and then insert the brad to buckle up the shoe.
Finished of the baby shoe with lace bows to the front of the baby shoes
More examples of baby shoes I have made using different papers.

I hope you get to try these out!


Saturday, 10 November 2012

Poinsettia Card

Video tutorial on Youtube under Links at side bar or go to
http://www.youtube.com/watch?v=3pGKHrZ_ij0&feature=channel&list=UL

Items used:
Time Holtz Tattered Leaves Die
6"x12" La Carta Bubble card stock in white
La Carta 120gsm Metallic paper in Rubine & Forest Green
Printed sentiment onto plain white cardstock
Hot Glue or Quick Drying glue
Double sided foam tape
Regular double sided tape

Die cut 10 red rose leaves from the Tattered leaves dies set and 3 green rose leaves. Adhere together 5 red leaves first

Pinch the ends to create dimension to the flower.

Adhere the next 5 petals on top (remember to offset the petals to create a fuller effect). Pinch the ends of this layer as you did with the first layer.

Adhere the green leaves to the back of the flower making sure you can see them from the front.

Fold a piece of 6"x12" cardstock in half to create the base of the card. Adhere poinsettia with foam double sided tape to the front and slightly to the top to make room for the sentiment.

Print a sentiment onto plain cardstock and snip fishtail ends to each side of the sentiment.

Adhere the sentiment to piece green metallic paper to create a lovely border around the sentiment. Cut fishtail ends using the sentiment as a guide.

Roll or use a tool to create a hill or arch in the sentiment. Also bend up the fish tail ends to create dimension to the sentiment. Adhere the sentiment to trying to keep the dimensional effect you've just created.

Have fun!