 |
| This is another 3D project using a Sizzix die. It looks so sweet after adding lollies/candy into it. Youtube tutorial: https://www.youtube.com/watch?v=uwTH04CPbFs
Items used:
Wheelbarrow die by Sizzix
Strong glue
La Carta Weave in Crimson 12x12" cardstock
Sam & Lucy's self adhesive glitter foam in red and green
Cardboard (from an old cardboard box)
Ink
|
 |
| Die cut 2 sets of the wheelbarrow shape out of cardboard. Then die cut another 2 sets out of cardstock making sure you flip one of them around so the front of the cardstock will be facing out once you put it together (this is especially important for cardstock like the La Carta Weave or Bubble that have texture on the front). You will also need a piece of cardboard 2 3/4" wide x 6 5/8" long and a piece of cardstock 2 3/4" wide and 12" long to cover most of the centre piece of the wheelbarrow. There will be a small gap so a small piece that is 2 3/4" wide and approx 2" should be able to cover the gap if you need it. |
 |
| Adhere the centre piece of cardboard with the La Carta cardstock. Thenadhere the rest of the cardstock pieces onto the matching cardboard pieces. |
 |
| The pieces should now look like this. |
 |
| Adhere the centre piece of the wheelbarrow to the back of one of the wheelbarrow shapes. |
 |
| Adhere the other wheelbarrow panel together |
 |
| I added some black ink to the pieces before adhering them to the wheelbarrow. I also inked the edges of the wheelbarrow to create shadow effects. I cut stars out of Sam & Lucy's self adhesive glittered foam sheets and adhered them to the sides of the wheelbarrow.This wheelbarrow is great for adding candy or lollies inside or can hold some items you want to store. |
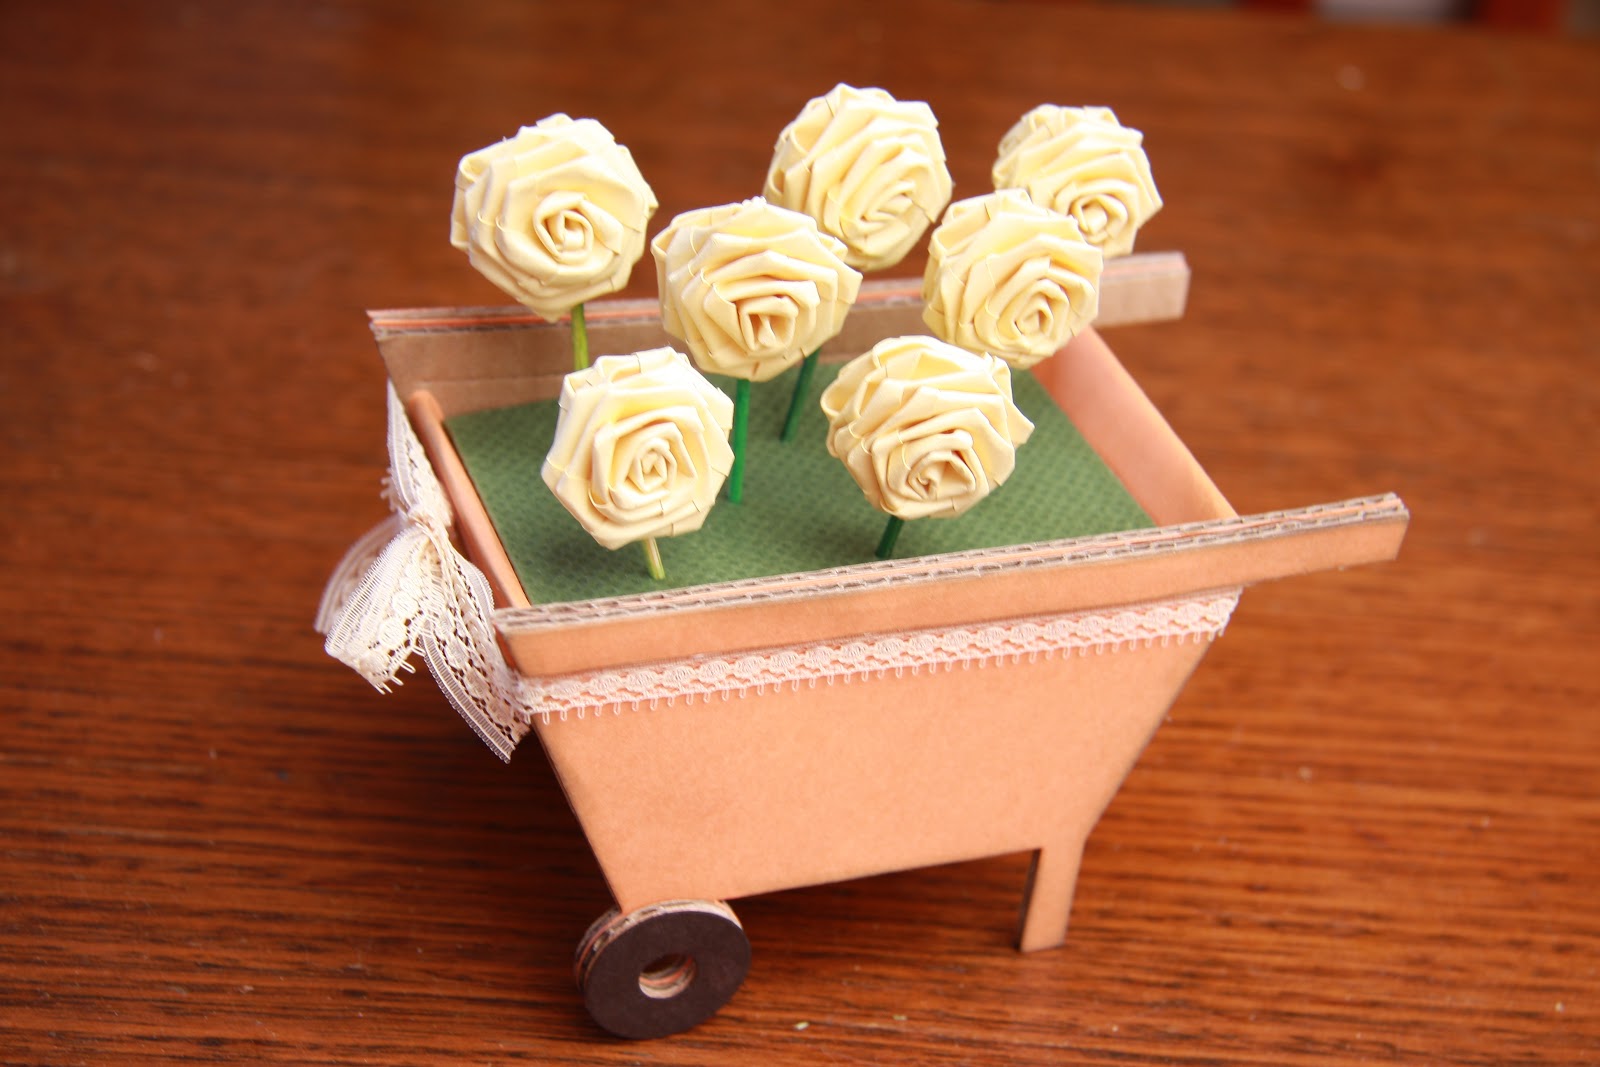 |
| This wheelbarrow I created is for decorative purposes. I filled it with foam and covered the foam with cardstock and added flowers on toothpicks into it. I also glued a lace ribbon around it. I hope you enjoyed the tutorial and inspired you to make one yourself! Take care :) |
Beautiful!!!
ReplyDelete